
How are you doing, fellow teachers? How are you finding your physical and emotional well-being during this Covid-19 pandemic? And how is your teaching going? Remote teaching certainly carries its joys and challenges, does it not?
This is intended as a followup to my previous article, Teaching Piano During the Covid-19 Pandemic. Many of us now have a few weeks’ worth of remote lessons under our belts. Hopefully, you are feeling fairly comfortable with your teaching setup (Are you keeping it simple, as I suggested in my article?), and perhaps you might even be feeling ready to make a few incremental improvements to your arrangement! It’s not looking like we will be back to in-person teaching very soon, so why not experiment a little, right? 🙂
And, of course, let’s make sure we are taking care of ourselves. There are small tweaks we can make to ensure our comfort and well-being during long stretches of teaching.
As before in my previous article, I am again not necessarily recommending purchasing expensive new equipment at this time. Instead, I’d like to share some ideas for simple, easy ways to upgrade your setup using mostly items you probably already have around the house.
The suggestions in this article range from the simple to the more involved, and they are addressed in that order. Don’t try them all, and certainly not all at once. Instead, select an idea here and there, and see where that takes you.
Please join me in taking care of ourselves first, so that we can then take care of our families and students well!
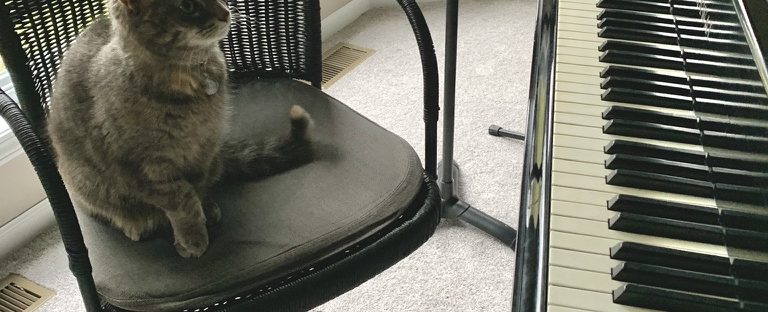
1. Sit Comfortably
Are you sitting on a backless piano bench while you teach over the internet? Why not swap it out for a more comfortable chair?
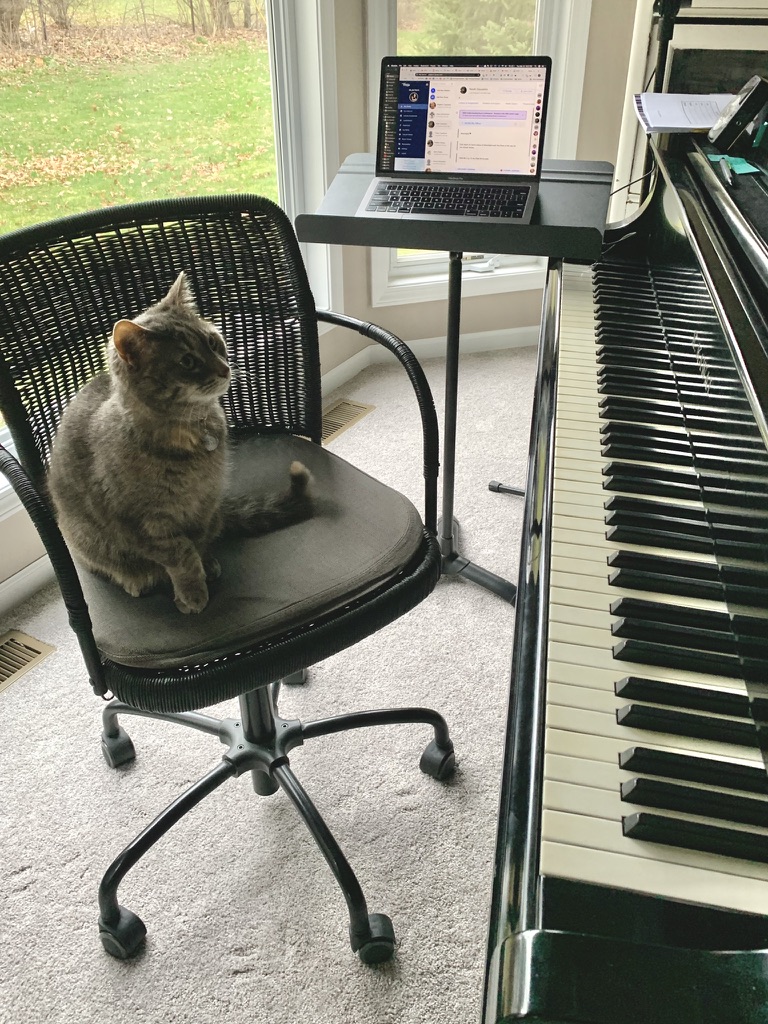
Using a chair with back support will help prevent soreness. If you use a computer chair, you’ll have the benefit of being able to swivel between the piano keyboard and your nearby resources — saving your neck!
2. Prevent Vocal Fatigue
Are you finding yourself talking louder than usual when teaching via the internet, and suffering from a sore throat by the end of the day? Here’s a few suggestions to help alleviate this issue.
A. Stay hydrated.

Keep water at hand, and drink regularly throughout the day. Pictured here is the glass tumbler I use and love. The straw makes it easy to take quick sips, which helps me drink more water throughout the day. I upgraded the plastic straw with this glass one, and it works perfectly.
B. Adjust the volume, or use headphones.
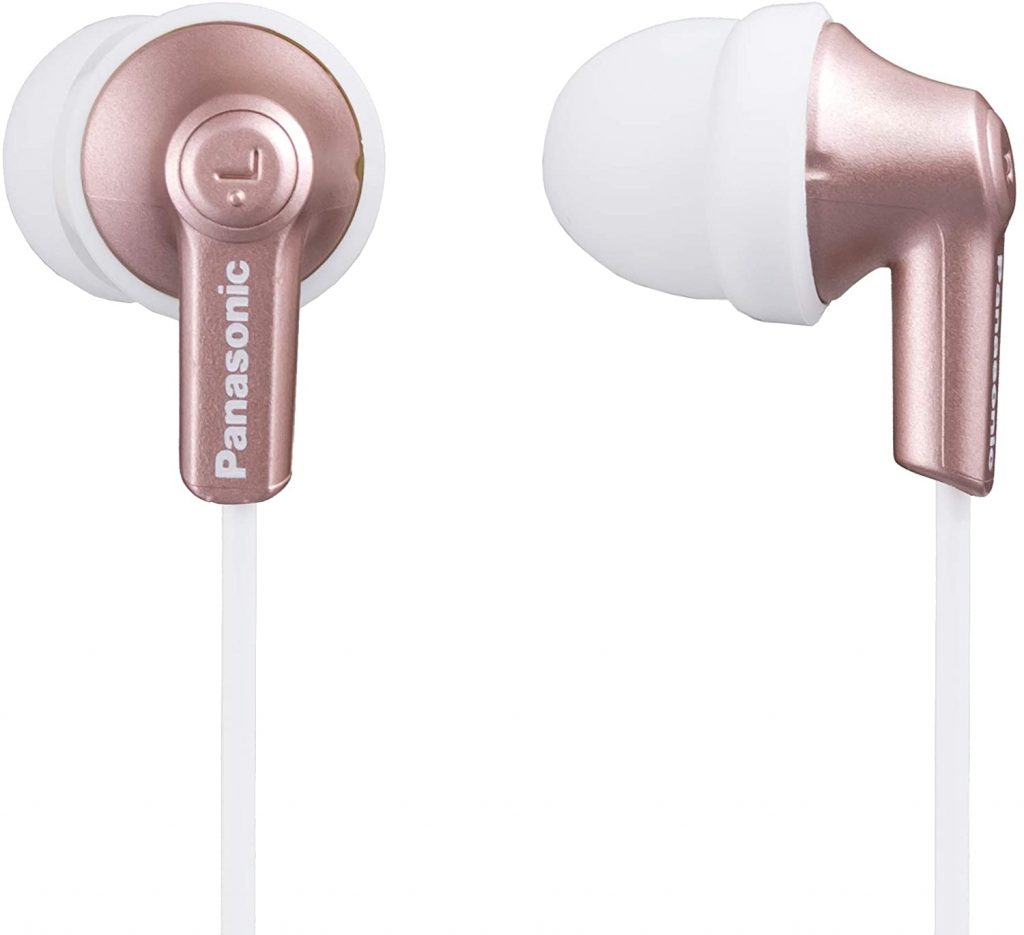
It’s a psychological thing: when we can’t hear someone well, we automatically start talking louder! Speaking at a louder level all day is bound to contribute to vocal fatigue. Try turning up the volume on your device, to see if that helps “trick” yourself into speaking at a more normal volume. Using earbuds or headphones may also help accomplish the same thing.
In addition, ask your students to turn up the volume on their end, especially if it seems they aren’t hearing you well. You can also suggest they wear earbuds or headphones. Regardless, avoid trying to speak over their piano playing; let students finish before you speak. Instead of stopping students vocally as you work on a piece, you and your students can get into the habit of playing only a short segment and then stopping to discuss.
C. Adjust your schedule, if possible.
Still suffering from vocal fatigue? If you have the flexibility, perhaps you could rearrange your teaching schedule to allow more frequent breaks. This will likely have a big impact on your mental and physical endurance.
3. Improve Your Internet Connection
Did you know you can improve your internet connection by moving closer to your router (or, moving your router closer to you)? Even better, if you are using a computer, you can hardwire your computer to your internet using an ethernet cable. These are simple tweaks are worthwhile to experiment with, if you’re curious about the possibility of improving your internet connection!
You may also want to consider bumping up to a better internet plan, if you think it’s related to issues you might be having. You can check your internet bandwidth using a website such as Speedtest.net. For videoconferencing activities, the generally recommended bandwidth is 1.5 Mbps.
Of course, the quality of your student’s internet connection also plays into the matter. If your students’ internet is not fast enough for videoconferencing, you may wish to consider suggesting asynchronous lessons — sending audio or video recordings back and forth (something I touched on briefly in this article). It can work remarkably well! It’s something you can at least trial with students, to see if it is a good fit.
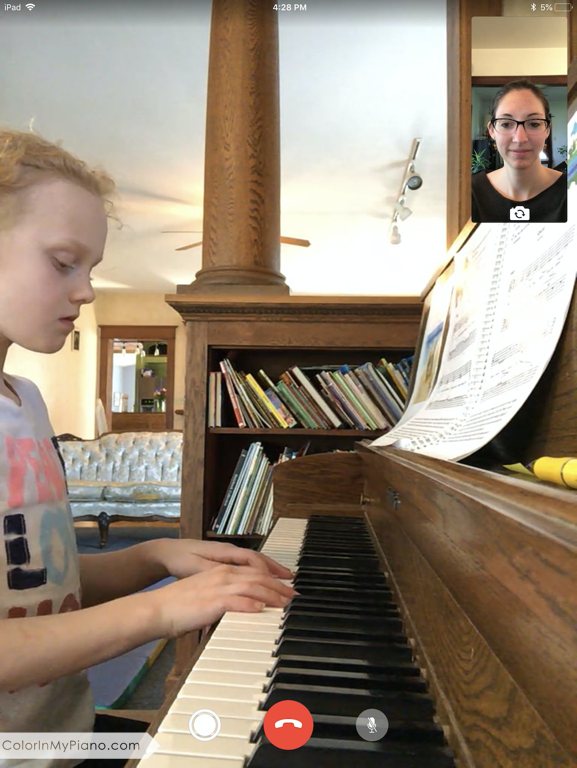
4. Experiment with Camera Angles
Would you like to provide a better view for your students, or are you wishing to see your students better? Here’s some ideas for placing your device in the optimal location, and for encouraging your students to do the same.
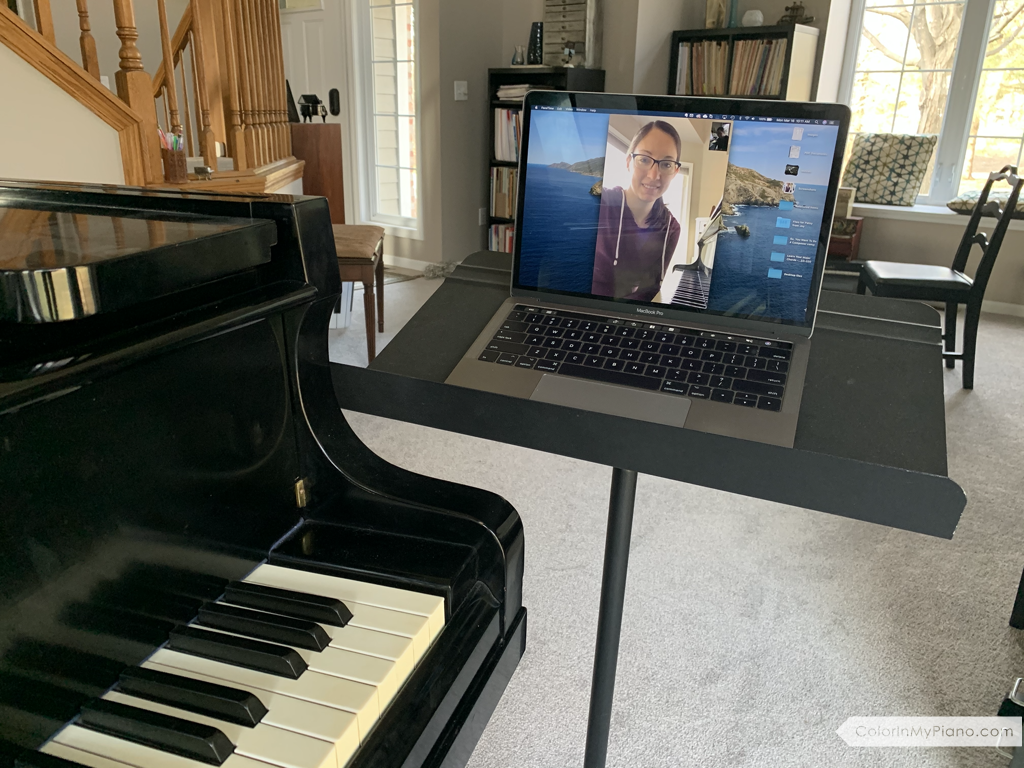
A. Laptops
An adjustable music stand works very well for holding a laptop (here’s the music stand I have) at whatever height you desire. Believe it or not, so does a stepladder! It’s nice to be able to use items you or your students already own.
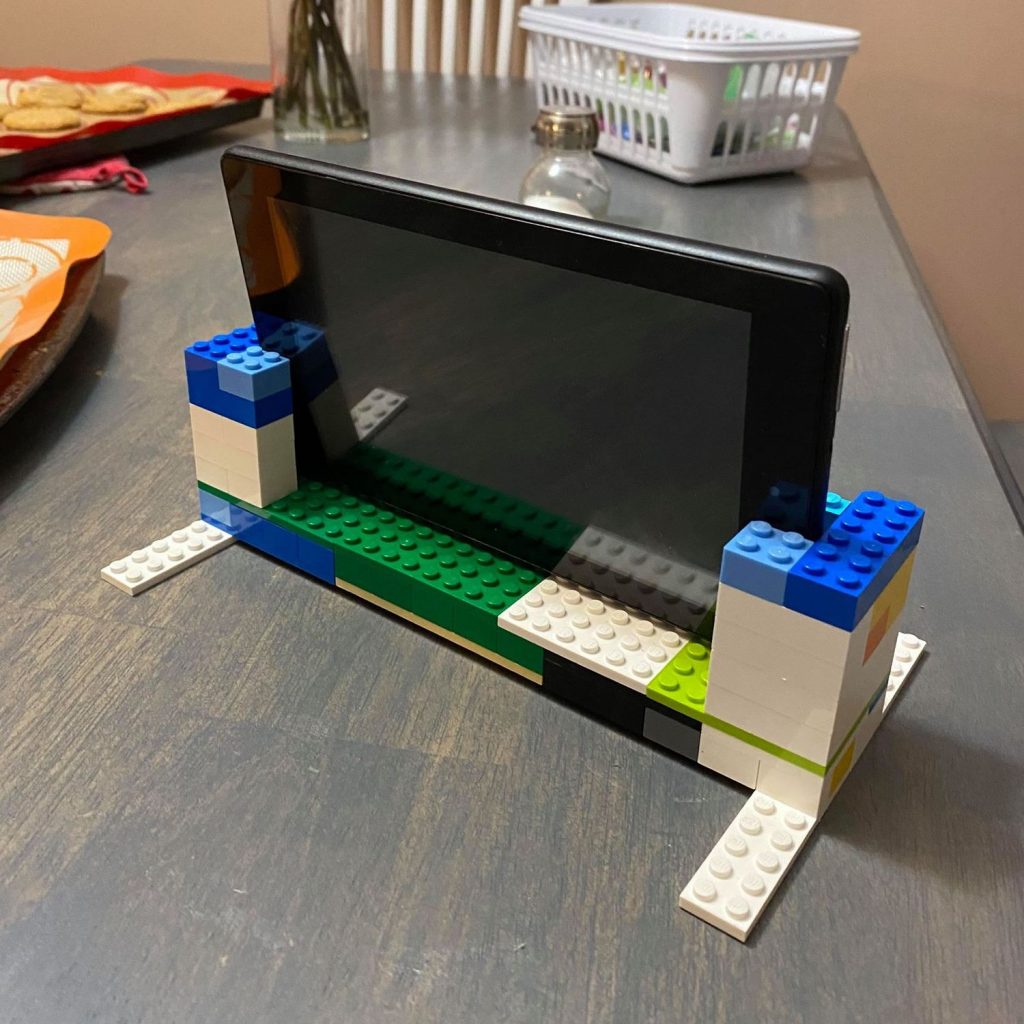
B. Tablets
If you or your student have tried putting a tablet on tabletop surface, you may have found many tablet cases don’t create an optimal angle for the camera — they tend to lean back too far. Here’s a fun solution that comes from piano teacher Greg Center that you might wish to pass along to your students!
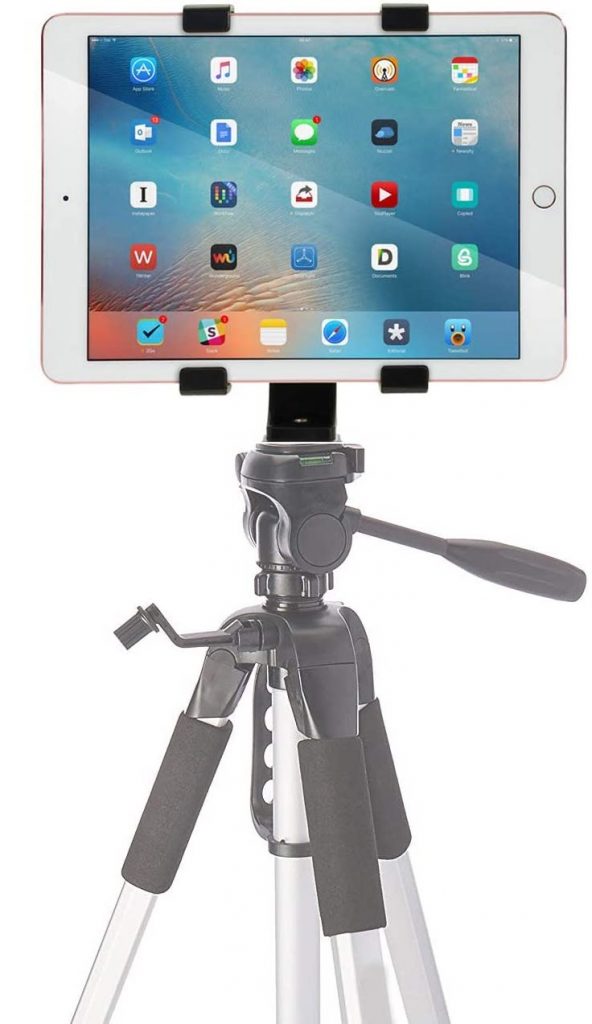
I’ve been seeing teachers speak highly of phone/tablet floor stands. But if you or your students happen to own a tripod, there’s no need to buy an entire stand; just get one of these affordable tablet tripod mounts, put it on your tripod, and — voila!
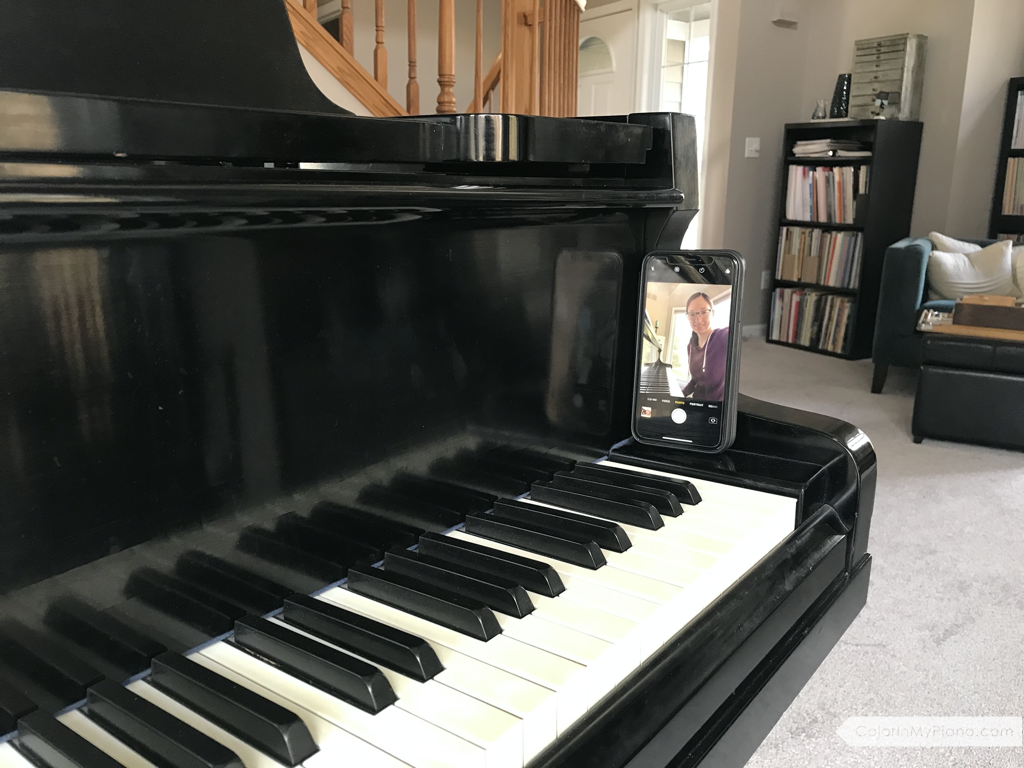
C. Smartphones
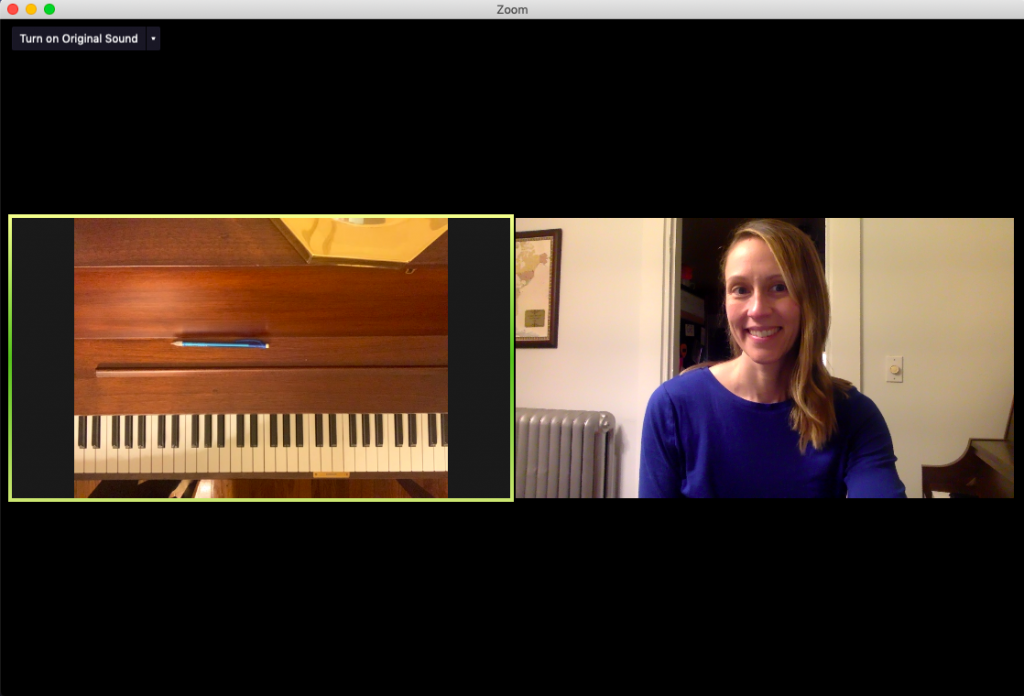
If you are using a tablet or smartphone, you may wish to keep it untethered so that you can move it around. It’s nice being able to alternate from the music rack (so students can see your face as you chat), to being propped up at end of the keyboard (providing a side angle for demonstrating arm/wrist/hand movements), or being held over the keyboard (allowing students to clearly see your hand on the keys).
(Read on later in this article for another great way to use your smartphone if you happen to have two devices at your disposal!)
If your students need help achieving a more optimal camera angle, don’t be afraid to coach them. Photo examples are especially helpful. Feel free to use the images in this post, or the ones shared in my previous article here — I’m happy to grant permission for that purpose!
5. Explore Platform Options
It’s good to have more than one platform option in your pocket, in case one doesn’t seem to be working well. I love the simplicity of FaceTime (Apple devices only), but there are advantages to Zoom, so I’m using that as well. Other options include Google Duo, Google Hangouts, Facebook Messenger, and Skype.
You might be interested in trialing Zoom with a student or two to see if the extra features it offers might be worthwhile! Here are some benefits of Zoom:
- Zoom is basically a virtual meeting room. You share a link with your students, and they can enter the room using any computer or the Zoom app on their phone/tablet. Zoom can host up to 100 participants — so it may be a good option for studio classes or even small live recitals.
- Many students are likely already familiar with Zoom, because of using it for schoolwork.
- The settings Zoom offers are more robust. One useful setting for piano teachers is the ability to turn on “original sound”, thereby bypassing Zoom’s echo cancellation and audio-enhancing features that tend to negatively affect musical sounds. Once your students are comfortable with Zoom, it might be worthwhile to instruct them to turn on this setting as well. (Until recently, turning on “original sound” was only possible on the computer, but now you can also do it in the phone/tablet app!)
- Zoom offers screenshare and whiteboard features. This can allow you, for example, to show and annotate a PDF worksheet or music score.
- The free plan for Zoom limits meeting lengths to 40 minutes. Purchasing the Zoom Pro subscription removes this restriction and adds more features, such as the ability to video record meetings. See more about the plan options here.
Zoom isn’t the only videoconferencing option out there, but it certainly is a good one to consider!
6. Add an External Camera or Microphone
I generally wouldn’t advise buying new equipment unless you feel you’ve outgrown your current setup. But, if you have equipment lying around, there’s no reason not to experiment with what you already have at your fingertips!
If you’re using a computer and you own an external microphone, you can use it to upgrade the sound quality your student will hear on their end. In turn, if your student has an external microphone, you’ll hear an improvement on your end.
If you’d like to add a second camera angle to your setup, there is an easy way to achieve this if you are using the Zoom platform. Your computer can provide the first camera angle, and then you can log into the same Zoom room using a second device: such as a smart phone or a tablet. Just be sure to leave the audio turned off for one of the devices as you enter Zoom, to avoid audio feedback issues.
If you can figure out a way to mount your second device over the keyboard, this camera angle could allow you to more easily provide visual demonstration for your students, which can be helpful especially for teaching young beginners. A microphone boom stand or a small, flexible tripod might work, or you can come up with your own clever hack. I’ve seen some very creative methods shared in the Facebook groups for piano teachers — such as using wire pipe cleaners to cradle a smart phone under a piano lamp!
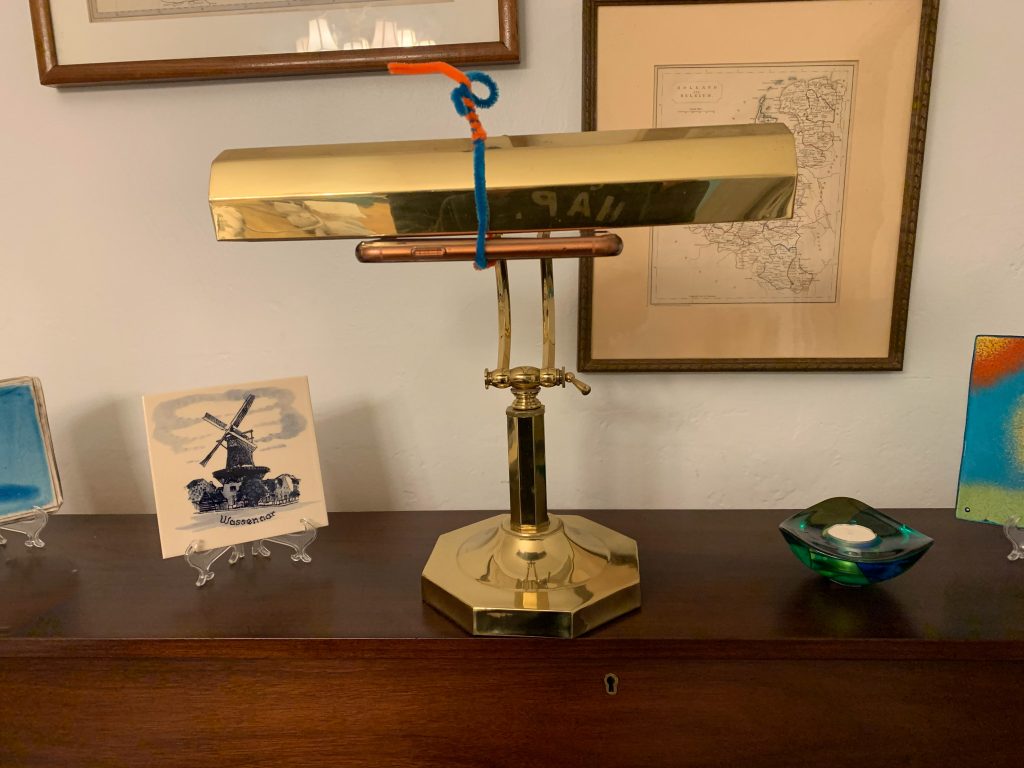
(Special thanks for Krista Jadro for this idea and for providing these photos!)
And that concludes my suggestions for simple upgrades you can make to your remote teaching setup. I hope you might have picked up a tip or two that will help keep you and your students comfortable and happy during this unprecedented time!
Your turn: How has remote teaching been going for you? And what advice or recommendations, if any, do you have to share? What have been the positive outcomes of this experience? Please leave a comment. I’d love to hear!
Remote teaching is getting better! I have found that giving myself 1-2 weeks to adjust to any new thing before adding another new thing is really beneficial. First used FaceTime for all but one family, then I added screen sharing/annotation in zoom with that one other family. Then slowly switched everyone else to zoom over the next 2 weeks.
One thing that is worth noting is that the 40 minute time limit on Zoom is only if you are adding a 3rd device (or more) to the meeting. If you only have one device on your end and one device on your student’s end, there are no time limit restrictions-you can have an hour meeting with siblings back to back no problem. Also, if anyone is also an educator and has an email through a school district, the 40 minute time limit restrictions have been temporarily removed for educators at this time
The one thing I have added is using blue light filtering glasses anytime I’m using the computer for something other than teaching. I’m spending a lot more time on my computer for planning both private lessons and distance learning opportunities for the homeschooling general music class I teach once a week and the eye strain is real. Many computers have a “night” mode where you can remove the blue light, but it does dim the screen a bit, so I prefer to use the glasses so I can help my eyes without changing computer settings. I’ve only used them for a couple days so far, but they really are helping to stave off headaches and eye strain! There are many brands, but we found some for around $20 a pair-we bought some for everyone in our family!
Oh, and I almost forgot! I happen to have a laptop, tablet, and smart phone at my disposal, it was SUPER helpful to create a zoom meeting with myself to familiarize myself with what the annotation tools look like on each device and how to access them so I could walk my students through the process. Smart Phones have the least amount of tools for annotating, Tablets have a few more options, and Laptops have the most-but younger kids have trouble coordinating drawing on a screen when they have to use a track pad or mouse (for example, only laptops have the stamp feature; phones and tablets have a drawable arrow). I have discovered that almost any game can be somewhat adapted by just drawing and erasing on the screen.
Your first article on remote teaching perfectly launched me… I decided to try FaceTime first at your recommendation. Oila! So easy. At your suggestion, I got our a little white board which I constantly, and works great for TEEN lessons. I write their NEW assignments on it, take a pic and text to their phones so they have it handy at each practice. Your advice to KEEP IT SIMPLE was brilliant! Totally kept me from me from panicking about being clever and creative. I enjoy teaching remotely a lot and love being home all day (for the last 15 years we have taught all day in studios in town). Stirring the soup while I listen to Hanon exercises feels absolutely decadent! Thanks as always for your timely, expert and user-friendly blog!!!!
P. S. I love PAGES on iPhone for assignment sheets.
I just started having students email me audio files of their pieces before lessons. They sounded so much better! I was able to listen to them and make some notes before their lessons. Then we used the meeting time to work on the things I heard.
I have been using Face Time (for the first time in my life) with my students and am super grateful to be able to continue teaching! One family had to take a couple weeks brake because we were not able to get a good internet connection, but that has been fixed and we had a lesson this week!
Teaching through a phone is definitely been a learning curve, but even teachers need a challenge to keeps us growing.
I have digital copies of most of my students music and the lesson books I use, so I open them on my computer before each lesson and can easily follow along as they play.
I have also found with the slight internet lag between me and most of my students it takes 40-45 min to cover what we normally fit in a 30 min lesson, but I have been willing to stretch them out because I have a flexible schedule.
I also try to take notes on their performance as I usually would and send them a pic after the lesson.
It has definitely been a learning curve and I much prefer teaching in person, but things have gone much smoother than I would have guessed and my students are advancing in spite of the turmoil out there ?
Hi Again, You are all Superstars. Not only do we teach music and have to make recommendations on instruments, exams, practising etc, we are also life coaches – encouraging, motivating and also thereby protecting our incomes. But on tip of that we have now become computer techies and have to give advice on anything related to any device to do online teaching, we also have to give advice on internet connections, make videos (and know the software), make backing tracks (being able to quickly zip through the internet for resources), do online lessons (multiple devices, microphones, sound levels, software) and being good teachers – using online resources, our own time and money gah the list goes on.
I have been on a major learning curve since Covid.
You are all stars. Take a moment to realise that. Well done to all of you. And Joy, you also have the time for Blog. Superstar!!. Well Done.