The last two weeks have been such a blur! My husband and I are fully moved into our new home and have begun the process of unpacking and getting settled. Last weekend, our priority was getting the piano studio room painted because my piano was scheduled to get professionally moved yesterday. Here are some photos of the room’s transformation!
In my last blog post, I shared a couple of photos of the room, but here are a few more BEFORE shots for comparison. When you enter the front door, you can take the stairway downstairs that leads straight to the piano studio room.
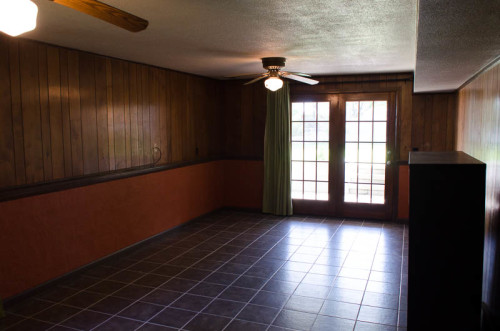
 As you can see, the walls are paneling.

The burnt orange walls and those seventies light fixtures aren’t doing the room any favors.

It is a nice, large room for my studio, though!
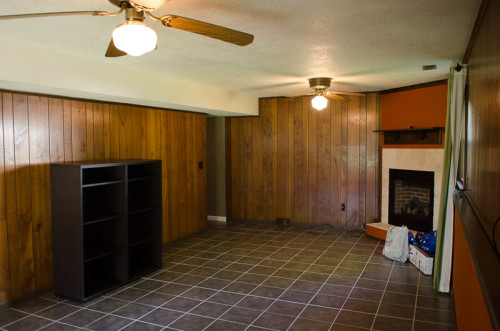
Love the fireplace. The tile flooring is nice, too. Lots of potential.
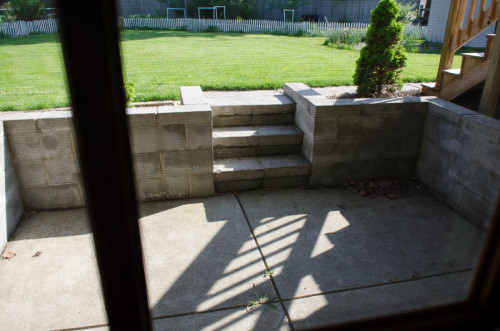
The doors lead to this patio which is under the deck. I’m going to put some patio chairs out here for the patio that I brought from here. I’ll also lay out an outdoor rug and let parents know they are welcome to sit out here during lessons.
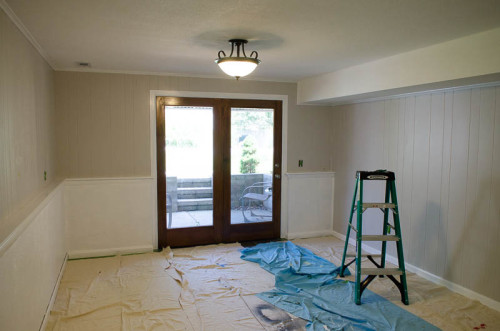
My sister has experience with painting paneling and was a huge help as we were updating the room. We took her advice to wipe a coat of deglosser over the paneling and trim to help the primer and paint stick. Here is a photo of the room after a coat of primer over everything, plus a coat of white paint on the trim and the lower part of the wall.

When we took down the old light fixtures, we discovered that each one held a single 40 watt bulb. No wonder the room was so dark! I bought fixtures that would each hold three light bulbs. I wanted semi-flush fixtures, hoping it would help make the ceiling seem taller and the room more elegant. I scored a great deal at Menard’s: these fixtures were $35 each.
Notice the three paint samples on the wall? I spent a lot of time researching paint colors on the internet. (Although I researched Benjamin Moore colors, I bought Olympic One paint from Lowe’s and asked them to match the colors.) I was looking for a gray that would be light and warm. On the internet, I found that I loved the Benjamin Moore color “Revere Pewter” and I thought for sure that would be the color I would choose. However, I brought home three different test-sized paint pots first before buying all the paint. It was a good thing I did, because Revere Pewter turned out to be much more yellow-y than I expected! Below, you can see the three paint samples. The colors from top to bottom are Stonington Gray, Moonshine, and Revere Pewter. We decided to go with Stonington Gray.
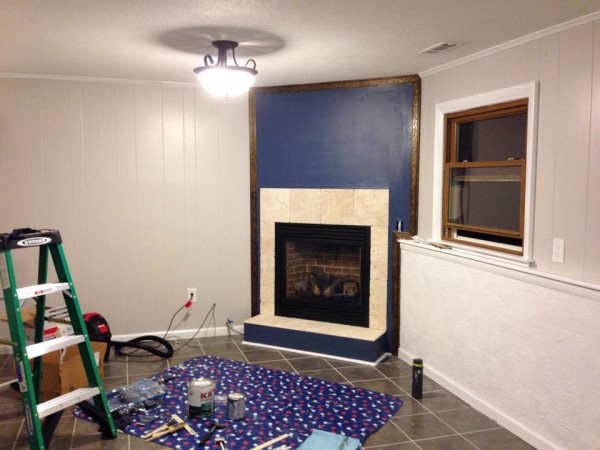
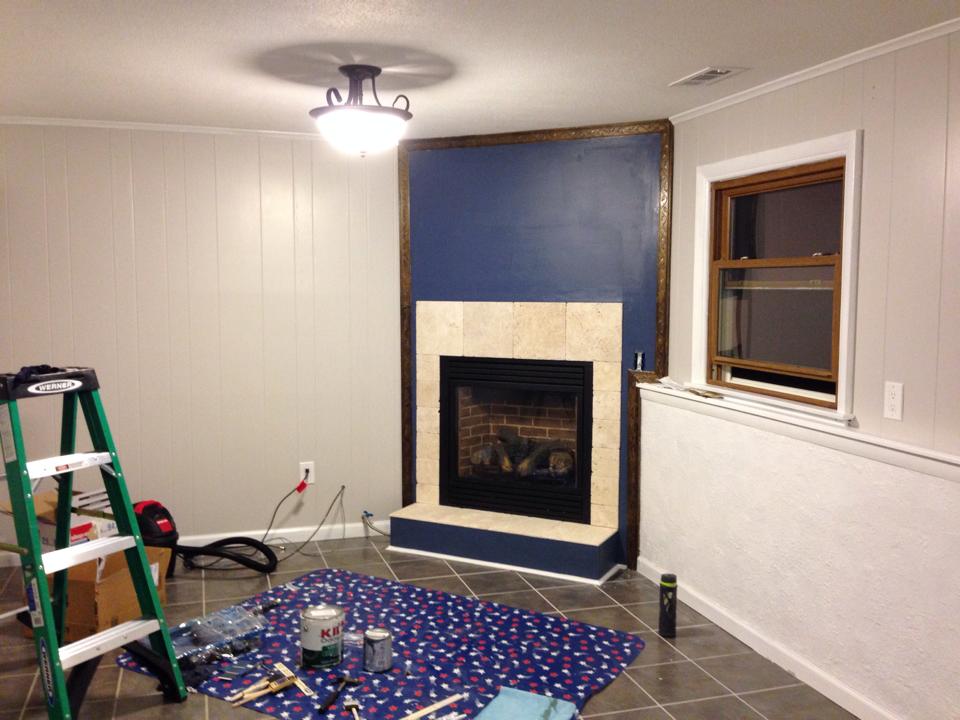
At the last second, we ended removing the mantelpiece over the fireplace. The wall around the fireplace will be painted blue to create an accent wall. 
Here is a photo of the room with a coat of the light gray on the walls. It’s coming together! I can’t believe this is the same room!!
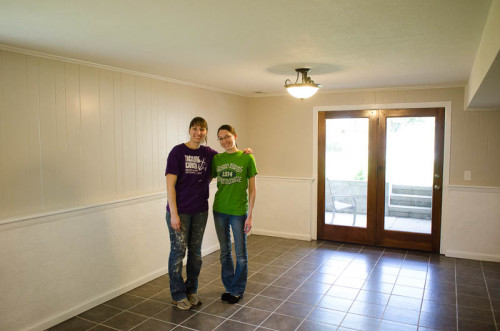
Here is a photo of my sister and I, proud of our handiwork! The paint job and the new light fixtures really brighten up the room.
Here is a photo of the fireplace with the blue accent wall. The color is BM Van Deusen Blue.
Tomorrow, I will share a photo of the room with the piano moved in! Update: Link.


Wow what an amazing transformation! It looks excellent. 🙂
Wonderful job! So exciting to be creating a whole new work space. A lot of time and effort – but such wonderful rewards!!!
Wow, what a perfect layout for a piano studio! My fiancé and I are gonna need something like this too because we both teach piano. I’ve still got a year before we get married though so I’ve got time.
Room looks so much nicer with just the paint and light fixtures!
Congrats on your new home 🙂
Thank you, Kevin! I am amazed at what a difference the paint and new light fixtures made!
Great job, ladies. It’s such a difference already. Can’t wait to see the final work of art. I love the cozy outdoor waiting area, I bet parents will really enjoy that. I also like the first pix where it looks like the cat is still deciding which room is right for her/him. Hope she/he is adjusting well, too!
My cats are adjusting very well to the new house! The black cat, Coda, made herself comfortable right away. My other cat, Kira, was the one I was a little worried about because of her abandonment issues. 😉 But she surprised me by “living” behind the washing machine for only a day before curiously wandering throughout the whole house! 🙂
an exciting time for you! What a lovely room!
Wow! The room seems light and bright now. What a great space!
Wow! That looks wonderful! What a transformation. You’re really going to enjoy your new studio, and I know your students will, too!
Joy,
Congrats on your new space! What a delight to watch you as you make this transformation. Your new studio looks BEAUTIFUL already. Enjoy!
Thank you, all!
I’m jealous! It is amazing what paint and lighting can do! We are wishing we had an entire large building separate from the house!!! Right now students have to trek from the front of the house to the back to the sunroom which disrupts family life and no privacy. I like how yours is still part of the house but separate. I wish you many, happy, teaching days there!!!!
Beautiful home you have! I wish I had a room dedicated for my piano.