
Back in May, I shared about how I organized a virtual recital for my students. In that post, I briefly mentioned how I combined two videos to create “duet” videos for a couple of my students. Today, I’d like to share how I accomplished this “duet” video magic, so you can try it for yourself if you’d like!
First of all, here’s an example of what I’m talking about. In this video, you’ll see a beginner student playing the rote piece “I Love Coffee” (from the Shaaks and of Piano Safari method fame), accompanied by me playing the teacher duet.
Below, I will share the steps for how to create and combine a student video and a teacher video to create a “piano duet” video. This technique is similar to that used by many YouTube musicians — you’ve probably seen the type. Even if you already know how to do this, I hope perhaps you’ll gain at least a helpful tip or two from this post!
Step 1: Acquire Student Video
The basic process is that one person records their video first, so that the other person can use it as a guide (using earbuds) while recording the second video. The first person’s video determines the tempo throughout the piece, which the second person must follow and match.
It’s up to you who you’d like to create their video first — the student or the teacher. I opted to let the student create theirs first, to make it easier for them this time around. I was working with young beginner/elementary students, and I wanted to be able to keep the process straightforward for their parents.
It is admittedly helpful to have as “perfect” of a student video as possible in terms of their tempo/rhythm. It may help to encourage students to practice with a metronome or backing track. When it’s time to record, you can also request that students take more than one video and to send you the best one or two.
That said, it is no problem if there are some imperfections in the student video. You can adjust for those, just as you would do for an in-person duet.
Step 2: Set Up to Record the Teacher Video
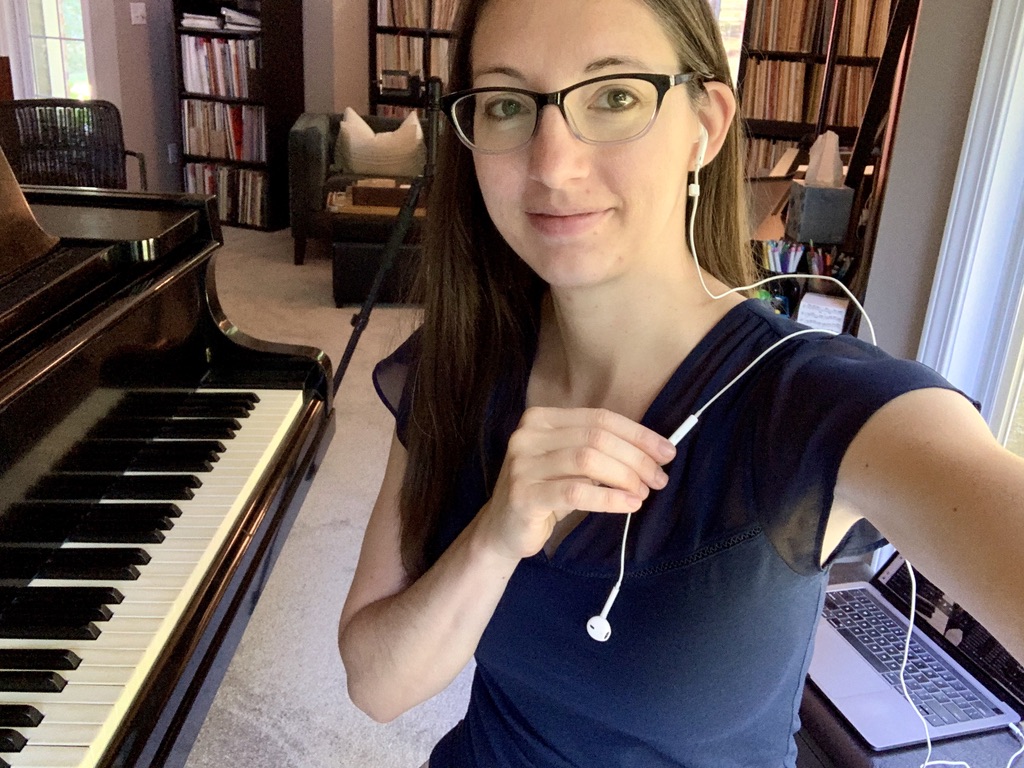
You’ll need two devices: one for listening to the student video, and one for recording your teacher video. You’ll also need a pair of earbuds (ideally with a play/pause control on the wire — more on that later) and a tripod (or something hold the recording device).
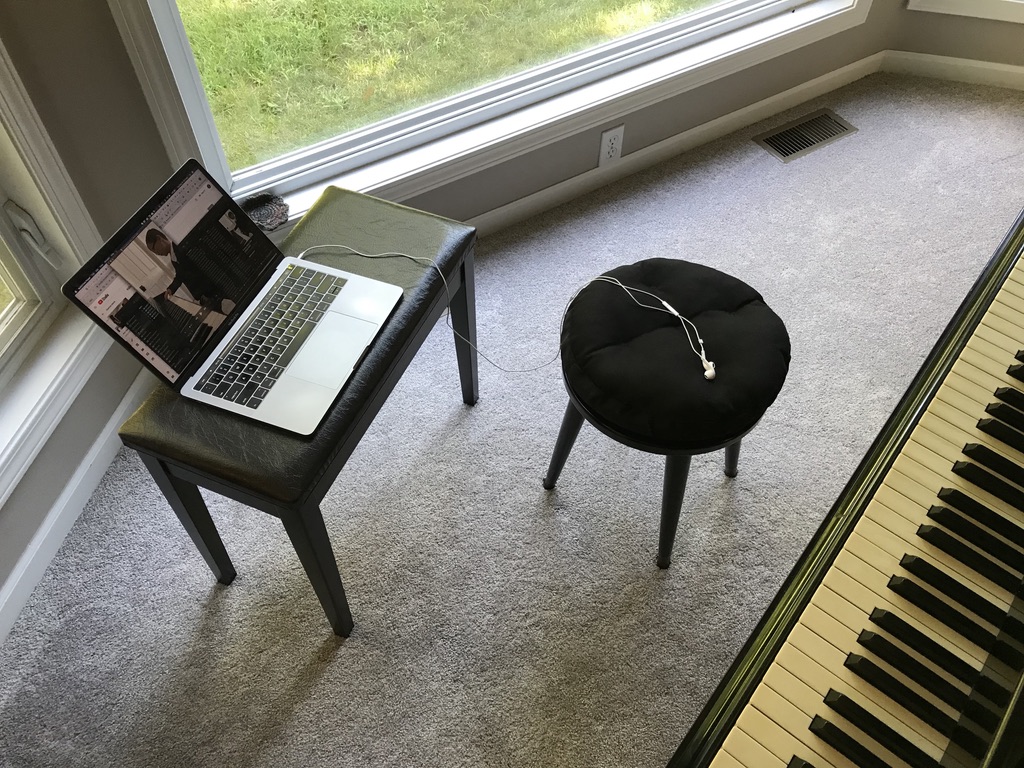
I decided to use my laptop to listen to the student video and my iPhone to record my teacher video. I placed my laptop near the piano, with earbuds plugged in and the student video pulled up ready-to-go.
Why use earbuds? It’s because we want clean audio for the teacher video. If the teacher video includes any audio from the laptop playing, it won’t sound as clean in the final video.
I set up my iPhone using a smartphone tripod holder on top of a tripod (similar here).
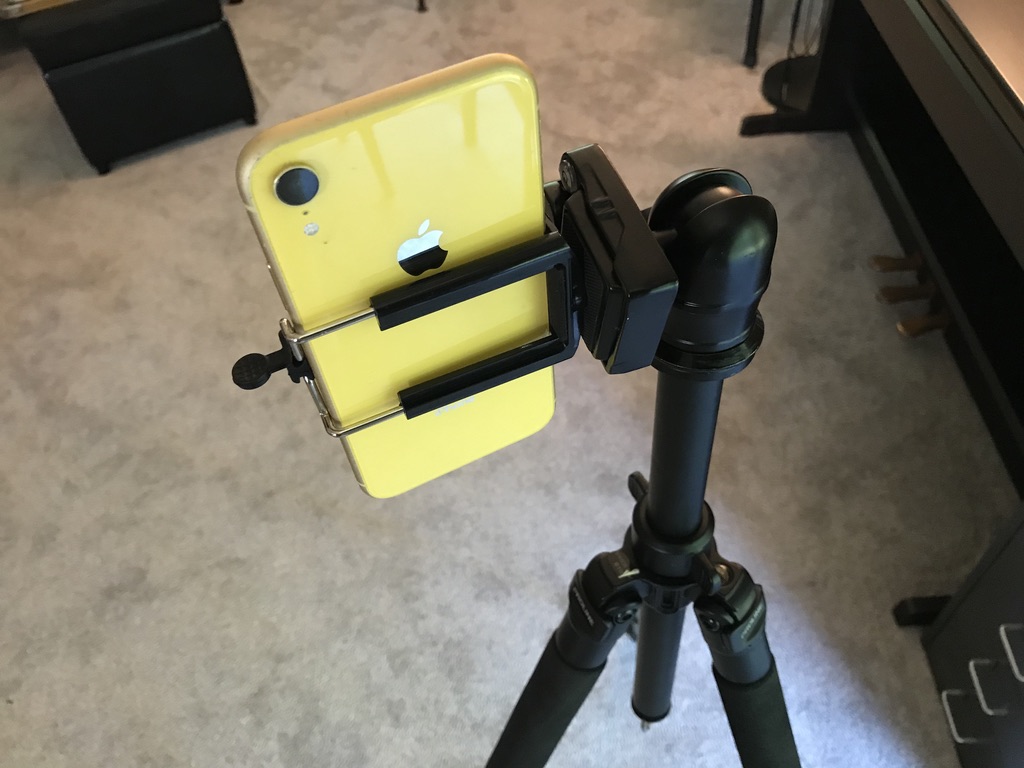
I tried to set up the frame of the shot to somewhat match the framing of the student’s video I received. We both shot our videos vertically rather than horizontally, which works nicely for putting them side-by-side in the final video.
You’ll notice that my laptop is out-of-view, outside the frame of the shot. This is part of the magic!
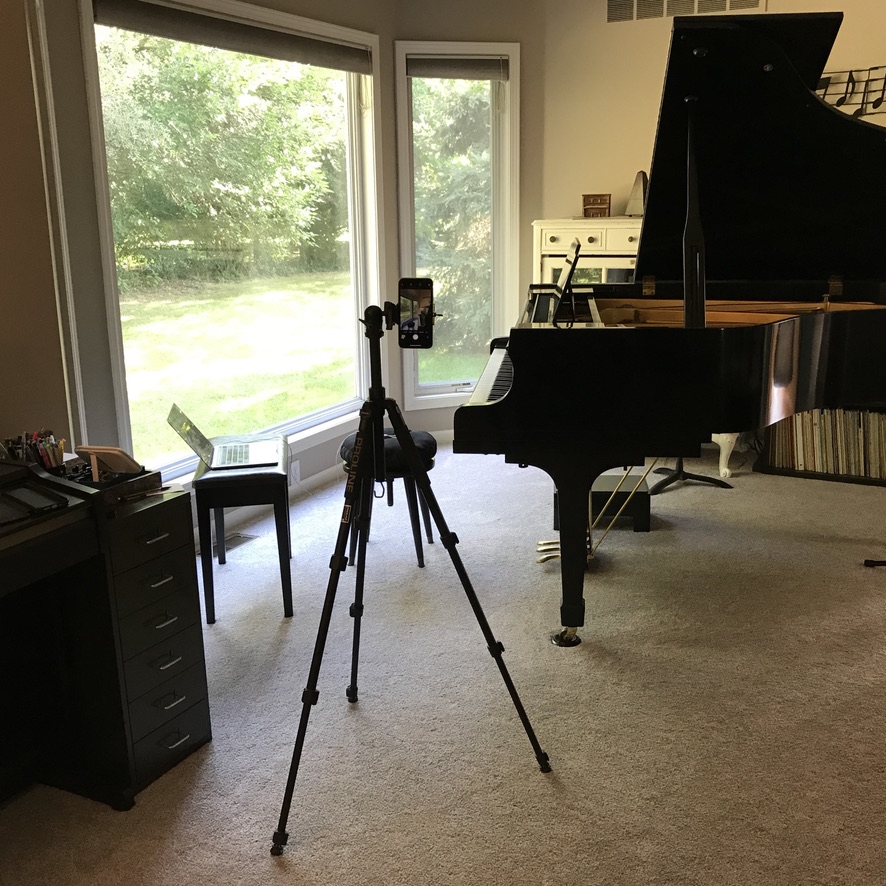
So, here’s how the whole setup looked.
Step 3: Practice and Record
Before hitting record, I did a few practice runs to get used to the timing of the student’s video. As any good collaborative musician would, I tried to follow in a way that would make us both sound good.
This is the time to also memorize how much time (or count the number of seconds) there is at the beginning of the video before the student begins to play. You’ll want to practice being able to start at exactly the right time after you hitting “play” on the student video. If you do it right, it will seem as if the two of you magically begin playing at the same time.
This is why having earbuds with an in-line “play” button is helpful. It allowed me to easily hit “play” on the student video while sitting ready at the piano, instead of turning around to operate the laptop. If the student video has plenty of extra lead time at the beginning, you will be able to later trim out the video footage of you managing the playback controls. It’s not a bad idea to ask the student to allow a few seconds on their video before playing!
But if you are given a student video that doesn’t include much lead time, it’s not a big deal — you just won’t be able to trim out the footage that shows you starting the playback video. If you are using the earbuds with the inline “play” button, it will be pretty discreet. Viewers most likely won’t even know what you are doing!
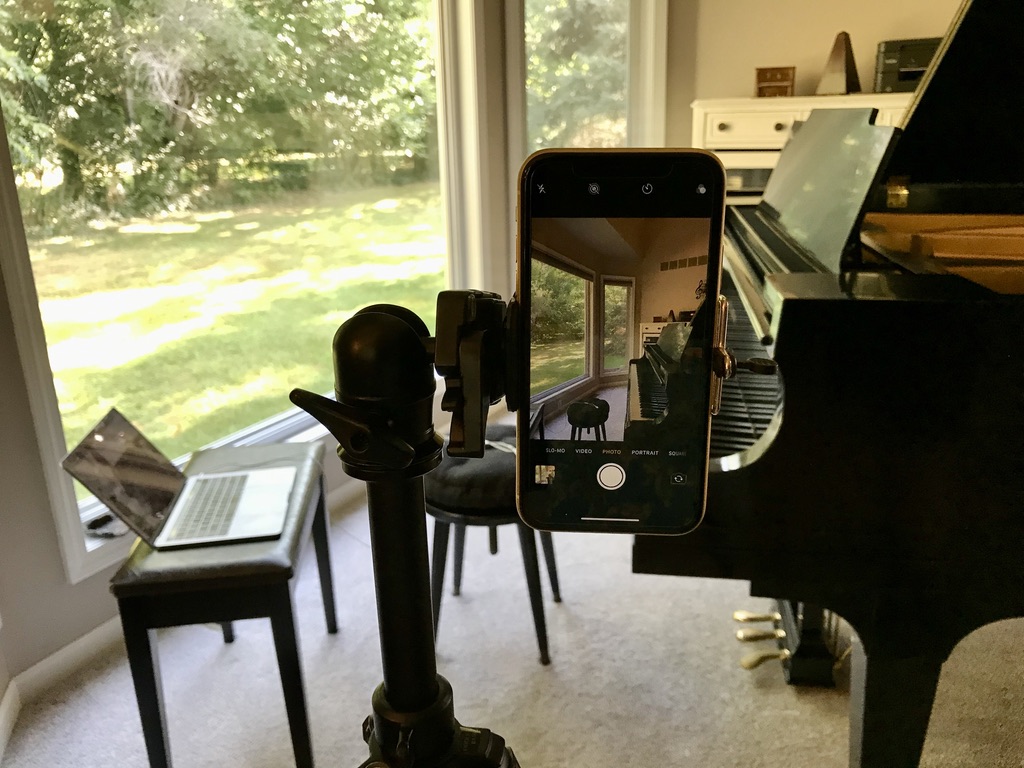
In the photo below, you can see my setup. I listened through only the left earbud, with the other earbud (the side with the in-line “play” button) draped over my shoulder out of sight. You can see the tripod for my iPhone behind me.
Once I felt practiced and ready, it was time to record! I hit “record” on my iPhone, got myself situated back at the piano, and then played along with the student video. I did this a few times, and then kept the best take.
Step 4: Edit the Video
Once you have your teacher video, it’s time to combine the two videos using video editing software! I used Adobe Premiere Rush (read more about it in this post), which is a pared down version of the professional Adobe Premiere software. I love it — it’s the easiest video editing software I’ve ever used.
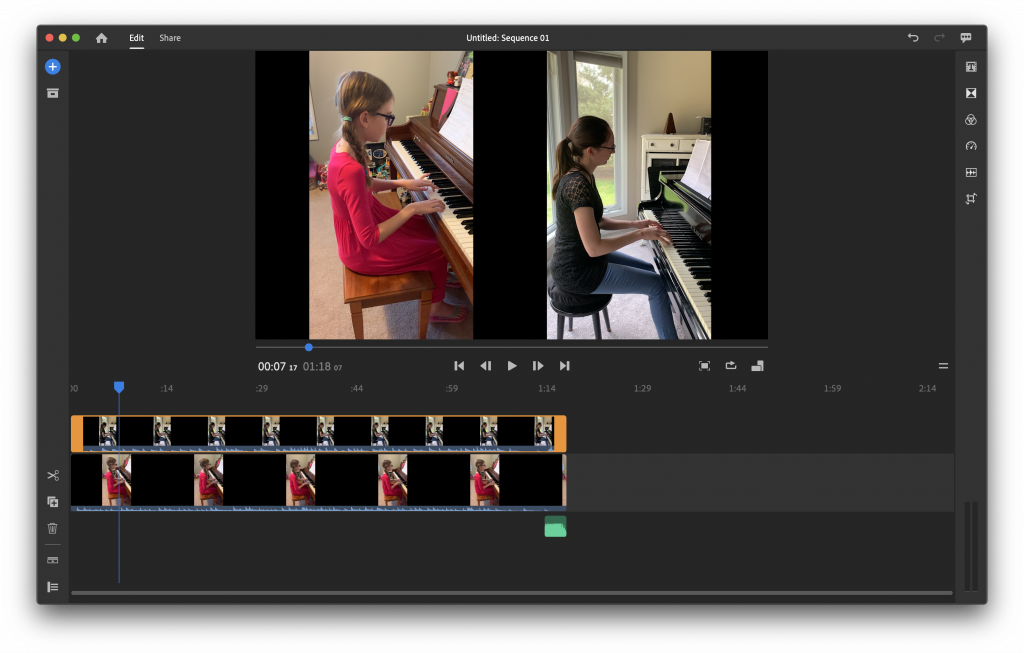
When the two video clips are first imported, by default they will play one after the other on the timeline. So, you’ll need to click-and-drag to place one of the videos above the other (as shown in the screenshot above) so they will play at the same time. The videos will not be in sync automatically. I had to listen and adjust the upper track until the audio of both tracks was together. I also trimmed any excess video footage from the beginning and end.
Next, I edited the visual layout of the video footage. Each video was resized and placed neatly side by side.
Once the video is ready, it’s time to export! The magic is complete, and the video file is ready for uploading to YouTube.
And that’s it! Those are the steps for creating a “duet” video of you and your student. It might seem like a lot when explained in writing, but the actual process is pretty straightforward once you know what to do.
Viewers of your video (including your student) might not realize exactly what magic goes into creating a video like this, but they will no doubt appreciate and enjoy the final product! And you’ll be proud of it, too. 🙂
If you’d like to create a video that involves two or more students (or the same student playing two different parts or instruments), the steps will be similar. Once you understand the basic process, the sky is the limit!
Your turn: Have you ever created a similar type of video before? Do you have any tips to share? Let us know in the comment section of this blog post!
Very helpful post–thanks for sharing your video setup and editing process!
I’m glad to hear it was helpful, Danielle!